I wanted to get a Motorcycle, but seeing the current price of things it seemed unattainable.
I was watching a documentary about Honda and noticed that the first motorcycle they made was basically a
bike with a 2-stroke engine attached to it; that gave me the idea to build my own.
Overview
I engineered a motorized bicycle by designing core components such as the engine housing, piston
assembly, and a custom ball-and-pinion clutch system, while optimizing drivetrain performance and fuel
delivery. This project emphasized mechanical design, system integration, and iterative refinement under
spatial and performance constraints.
What I built
One of the most technically involved projects I have worked on was designing and building a motorized bicycle from the ground up. This project required a combination of mechanical design, fabrication, and iterative problem-solving.
Design & Engine Development
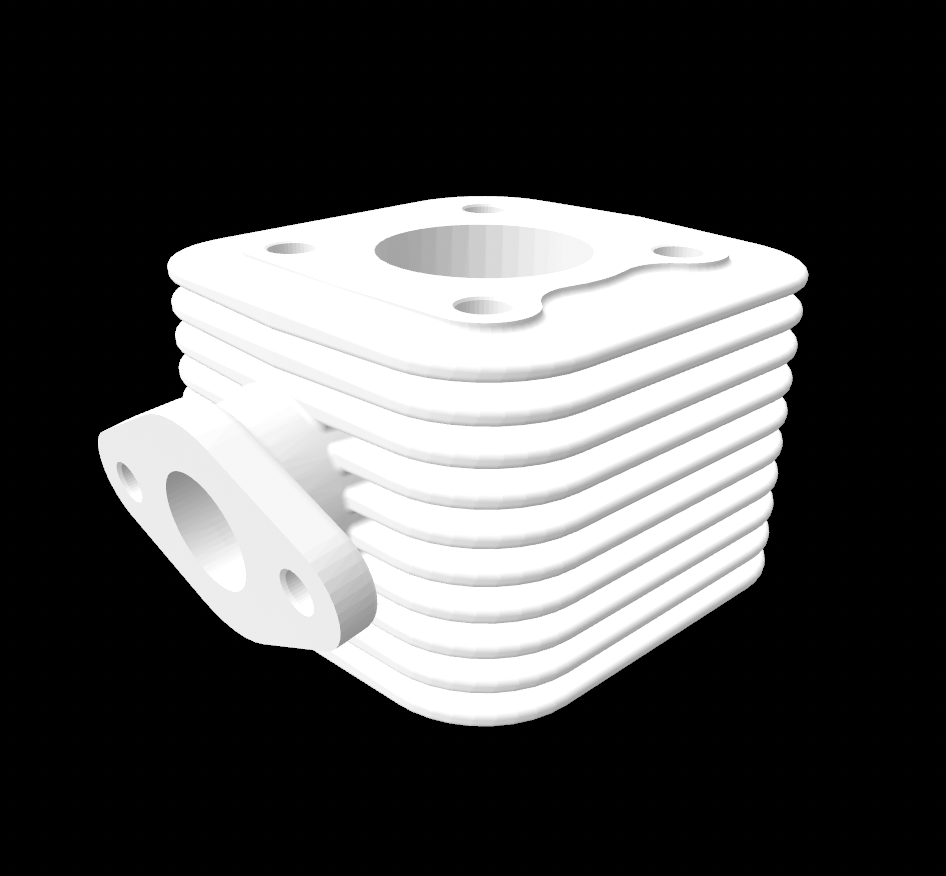
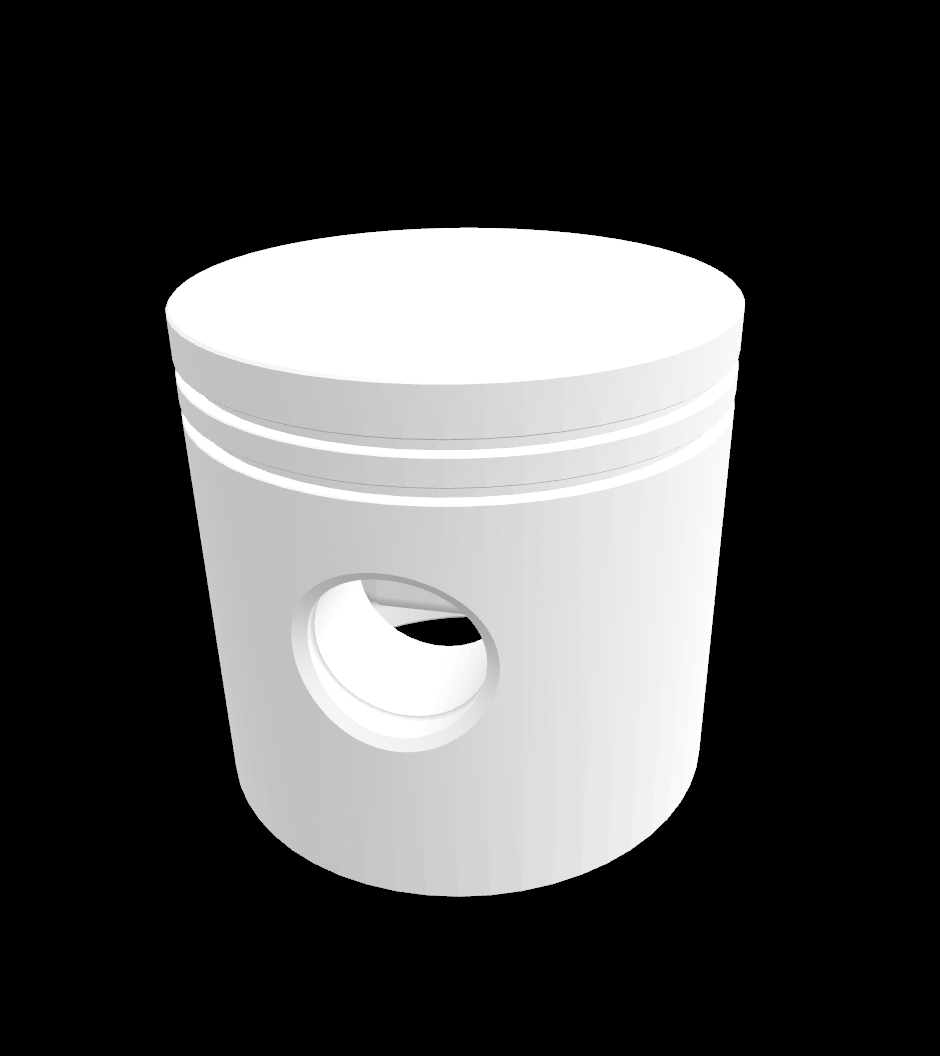
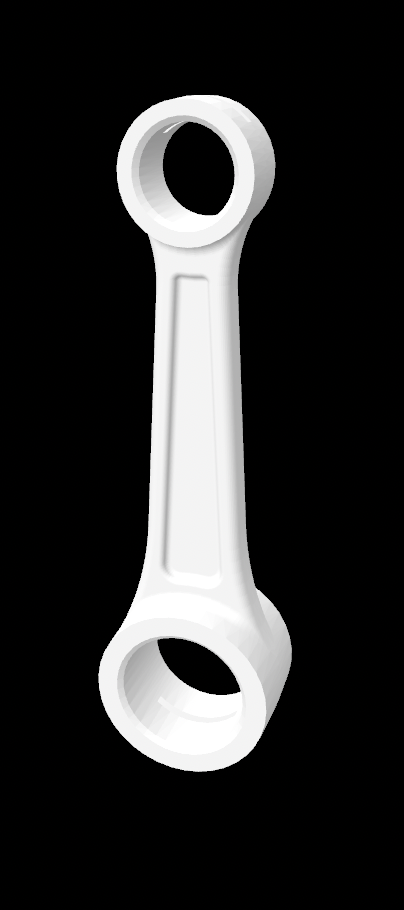
I designed several core engine components, including the engine housing, piston head, and connecting rod assembly. This required careful consideration of fit, alignment, and mechanical reliability within a compact system. I have attached images of some of the CAD files below:
Clutch Mechanism
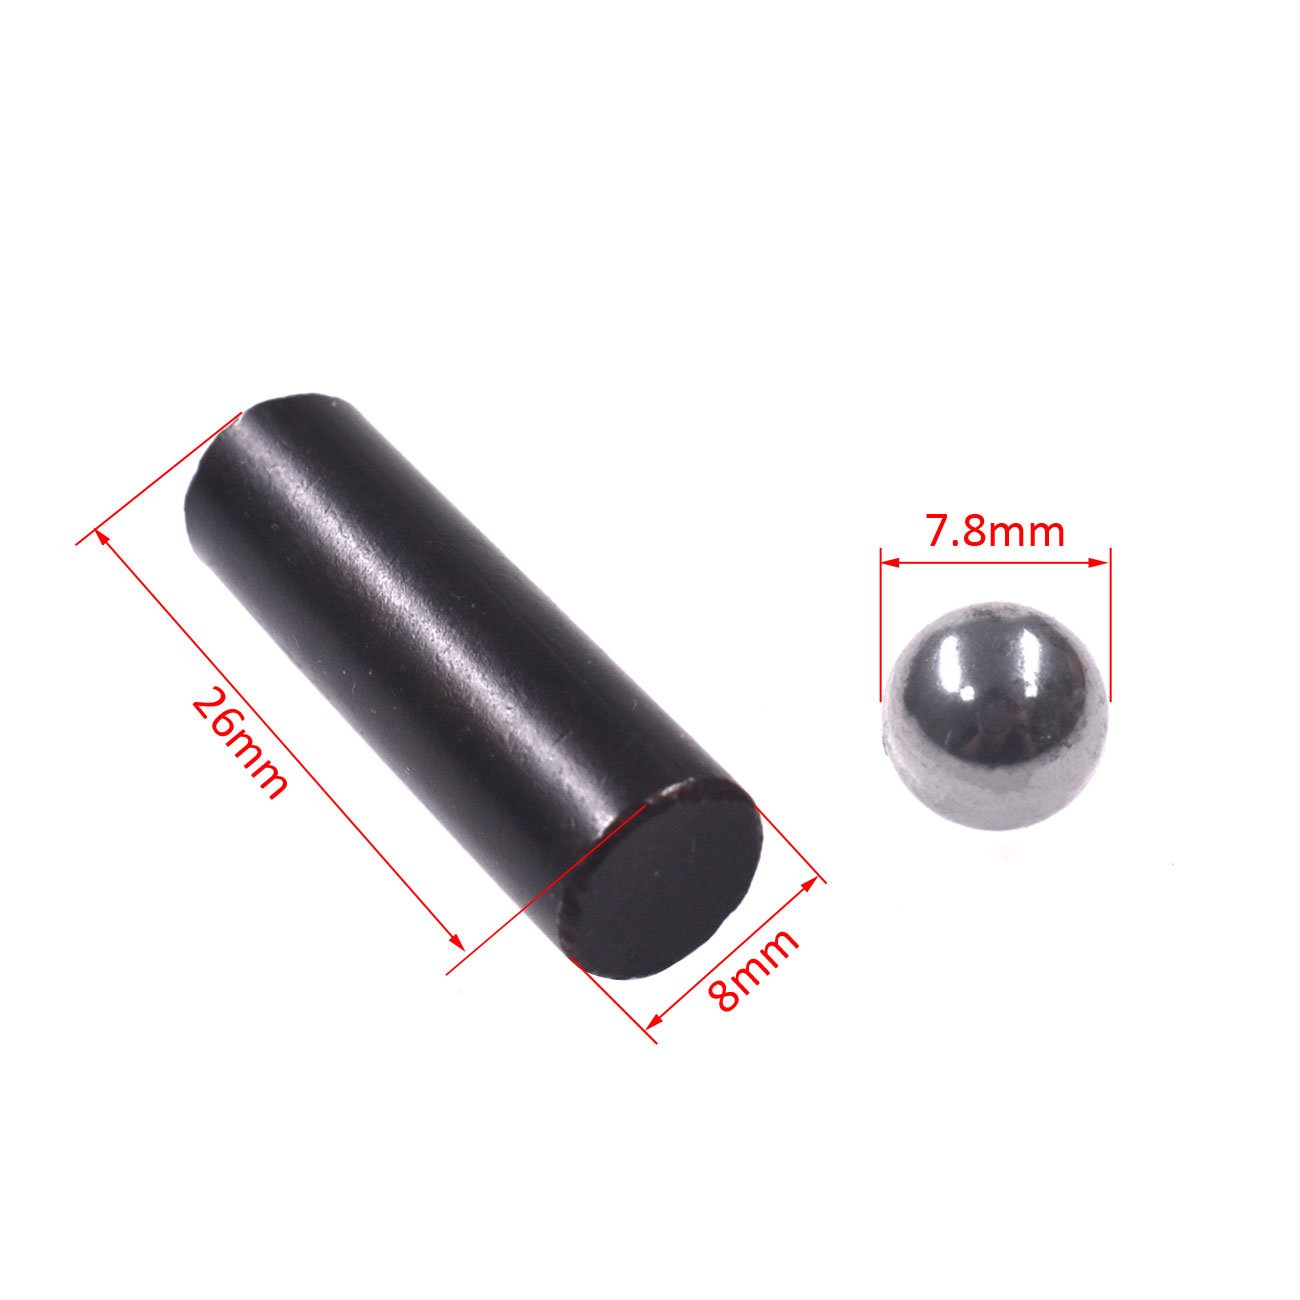
A key challenge was developing a functional and compact clutch mechanism. I implemented a custom ball-and-pinion clutch system, where actuating the handlebar lever drives a pinion that pushes a ~8 mm stainless steel ball bearing into a clutch spring, disengaging the connecting rod. This allowed the rider to decouple the engine during startup. Once the bike reached approximately 6 mph, the clutch could be released, allowing the engine to engage using the system’s inertia.
This is an examle of the one I used in my design, simple yet effective.
One issue I encountered was that the clutch required continuous input to remain disengaged. To address this, I designed and 3D printed a simple locking mechanism that holds the clutch lever in place when needed, improving usability without adding mechanical complexity.
Drivetrain & Mounting
The engine was mounted to the bicycle frame at a 34-degree angle. While this angle was primarily dictated by spatial constraints, it required careful alignment to ensure drivetrain efficiency and stability.
Power was transmitted through an 8-tooth drive gear connected via chain to a 32-tooth gear mounted on the rear wheel, replacing the original brake disc assembly. This gearing configuration prioritized higher speeds but required the rider to pedal to an initial speed before engaging the engine due to limited starting torque.
Combustion Cycle
I bought a Cheap spark plug from my local Auto-Zone along with something called a spark plug wire end (very descriptive), this is bascially
a little cap that goes on top of the spark plug with a metal contact at the end of it which allows it to carry a charge.
The wire end was attached to a dyno that generated around 15 Watts of power, this dyno was just a Copper roll I bought and stuck
magnets inside that sit on a “floating” bearing to create a kind of crude AC motor. Now if you take apply a charge to this design the
bearing will start to spin based off Faraday’s Law of Induction, but if you sping the magnets inside the system actually outputs a charge.
Fuel System
For the fuel system, I integrated a carburetor based on a Yamaha SR250 design. Minor modifications were necessary, including replacing the supplied gasket with a thicker one to ensure proper sealing and consistent fuel delivery.
The engine operates on a premixed fuel consisting of 91-octane gasoline and 2-stroke synthetic oil at a ratio of approximately 1 liter of gasoline to 4 ounces of oil.
Key Takeaways
This project strengthened my ability to:
Design mechanical systems under real-world constraints
Iterate on imperfect designs and troubleshoot failures
Integrate multiple subsystems into a functional prototype
Balance trade-offs between torque, speed, and usability
Takeaways
Don’t try to reinvent the wheel. I tried to create my own carburetor, which didn’t work out as I kept messing up
the precise bore depth, and chanel width to get the perfect fuel to air mixture. after 3 failed attempts of trying to diy
a carburetor I ended up buying a Yamaha SR250 based design (Yamaha know how to design a carburetor much much better than me).